Topaz Studio 2: Introduction and Workflow for Beginners
introduction and workflow tutorial -> | Introduction |
01 |
02|
03 |
04 |
05 |
06 |
07 |
08 |
09 |
10 |
| digital painting examples |
resources |
about |
impressionist painters
| contact-questions |
Part 3: Exploring the Topaz Studio Interface and Filters and Looks
Open Topaz Studio (I'm using version 2, but you can get along well if you have version 1). If you don't load an image, you'll not be able to see and do what I suggest.
Once you have your TS-ready image (or my Tigerlily image) loaded, you’ll see two choices at the top right of the TS2 window.
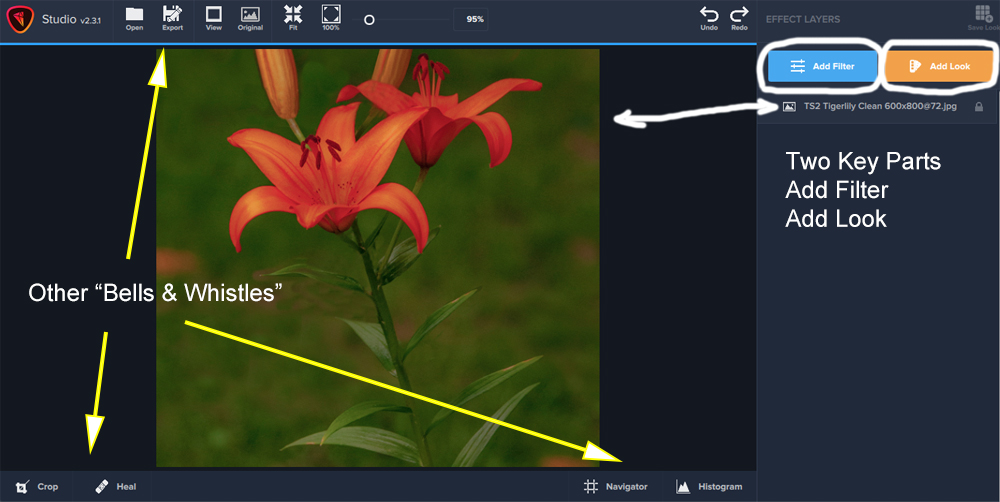
Add Filter provides you with a long list of filters that can be used in creating painting-like images. Only a few, e.g., “Impression” are good for impressionist-type digital paintings. Some others are good for watercolors.
Click on "Add Filter" to see what happens. Just a peek. Not much will happen because many of the filters are set so zero and you need to used the various sliders to achieve the "look" you want.
Add Look provides you with numerous presets which (filters sets of filters) aimed at the brushwork of impressionists like Monet, Degas, and Cezanne. You’ll also be able to find presets named for a type of brushwork used in a painting, e.g., “Impasto,” “Palette knife” and “Pointillism.”
Click on "Add Look" to see what happens. Again, just a peek. In this case, you may be dismayed in that you'll see some awful "looks." The presets should be thought of as possible starting points to use in moving toward the type of digital painting that you want. And they may show you some ideas that you weren't thinking of too. But don't spend too much time. It's unlikely that you'll get a "look" by clicking on any of them that are pleasing to your photographer's and wannabe creative image maker's eye. And if you do happen on a good look, the next section shows you how to save it as one of your favourites.
And when you're done peeking and fooling around by clicking on some filters and presets, go on to part 4, where we'll explore some of the presets and learn what they do and don't do.